Photoshop Tricks
From the very beginning I’d like to admit that I’m not a professional web designer. Sometimes I love to draw, and sometimes I even have to do it. In this article I’m not going to teach you design. We are not a specialized design studio. Design is usually provided by the client or we interact with third-party agencies. The only two things we have to deal with are slicing and technical design.
An initial design concept may often undergo changes in the course of its integrating with the functional part. Besides, designers do not always draw every single page and every state/behavior. We have to do these things called technical design by ourselves.
An ability to do something quickly is essential, and I’m going to share some helpful tricks saving a lot of time. In addition, I would like to give a few examples of best practices we have noticed while working with different designers.
Top shortcuts
Efficiency is key. It’s not just about knowing how to do something, but how to do something quickly and use valuable time for executing a task. Below are my favorite shortcuts to remember. I’m using Mac, thus all my shortcuts are tailored for it.
- Save for Web – [cmd+opt+shift+S]
- Quick transform – [cmd + T]
- Switch between document windows – [ctrl + Tab]
- Duplicate layer
- duplicate selected layer – [cmd + J] or
- hold down [cmd + opt + drag] to duplicate the active layer or
- [cmd + opt + arrow keys] (Up, Down, Left, Right).
- Image Size – [cmd+opt+I]
- Canvas Size – [cmd+opt+C]
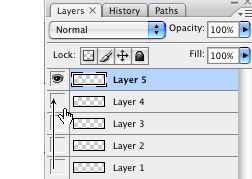
- Show / hide in a row. If you need to show / hide more than one layer, instead of clicking them one by one you can click on the visibility icon and drag in a row.
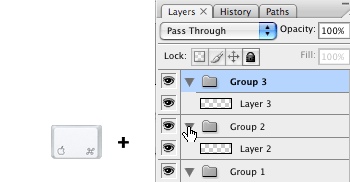
- Collapse or expand all layer groups. You can collapse or expand all root-level layer groups by holding down [cmd + click] on the triangle icon.
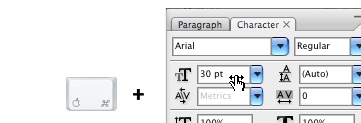
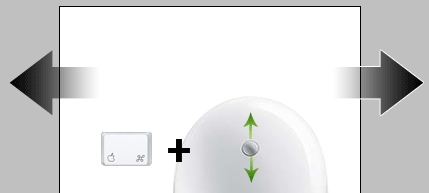
- Drag to adjust numeric value. Mouse over the input box, hold down [cmd + drag left or right] to increase / decrease font size value. Holding down [cmd + opt or shift] key and dragging left or right will change the value by decimals or intervals of 10. This shortcut works in all dialog palettes.
- Zoom with the scroll wheel. You can zoom in / out by [cmd + opt + scrolling up or down]

- Cycle through Screen Modes – [F, F, F]
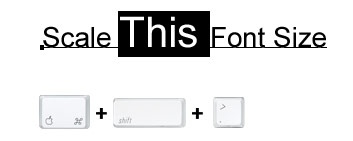
- Scale font size
- Navigate the document left or right. Holding down the [cmd + scrolling up or down] allows you to navigate the document left or right. For example, hold down Cmd + scroll up will navigate to the right.
Want to learn more? Check the following articles:
- Smashing Magazine – Top 10 killer photoshop combo moves
- Smashing Magazine – Obscure photoshop time savers
Some useful Photoshop tricks
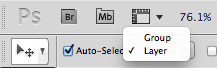
- Intuitively “selecting layers” or “groups“. With the Move tool (V), you can [cmd + click] on the canvas to select the uppermost layer with pixel data located directly below the mouse. If your layers are grouped within layer sets, this action may select the entire folder. You can change this behavior and select the actual layer by using the Auto-select drop-down in the Move tool’s property bar.
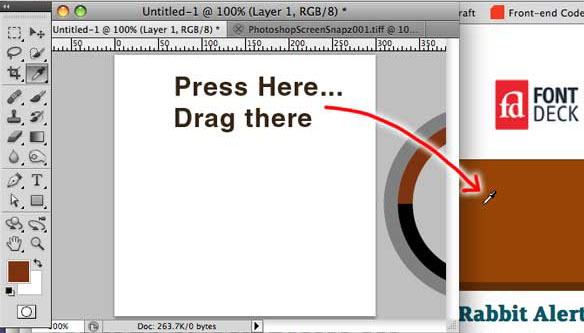
- Eyedropper for any objects. Need to match a color from a web page or any other object on the screen while working in Photoshop? Just select the eyedropper tool, put the cursor where you need it in your Photoshop file, press the left mouse button and drag the cursor outside the Photoshop window to sample the color from an object on your screen.
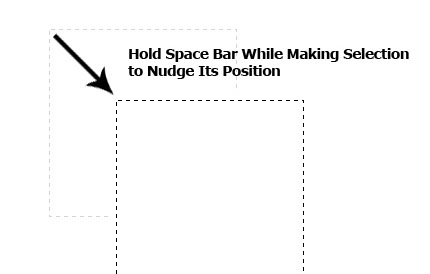
- Move the Selection Marquee Before Committing. Have you ever tried to crop something with the Selection Marquee only to see that your initial placement of marquee was off by a few pixels? Ugh… That can be frustrating, forcing you to redo the entire selection. Instead, while dragging the selection out hold down SPACE with your thumb.
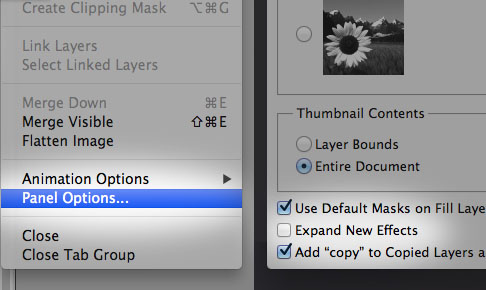
- If you want to disable auto-expanding the effects list go to the Layers panel menu, select Panel options and un-check the Expand New Effects box at the bottom!
Photoshop etiquette rules
Whether you’re working as a freelancer or within a team, you often need to collaborate with other people on a project. It’s important to try your best to prevent time constraints, old habits, scattered focus, and sometimes banal laziness from messing up your PSDs. Even when our PSDs are properly organized, they’re not necessarily optimized for a collaborative workflow. Below are some common rules and practices to keep in mind when preparing PSDs for sharing them with clients or co-workers.
Check out an interesting web site on this topic – Ps Etiquette
Guides
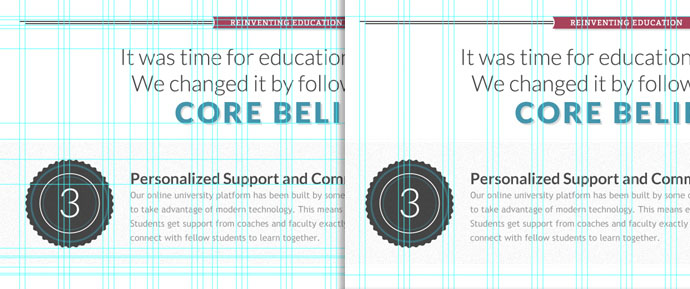
Make sure all guides you use are absolutely relevant and necessary. Having too many guides will make your partners feel overwhelmed, causing them to disregard your guides completely.
Organize your structure
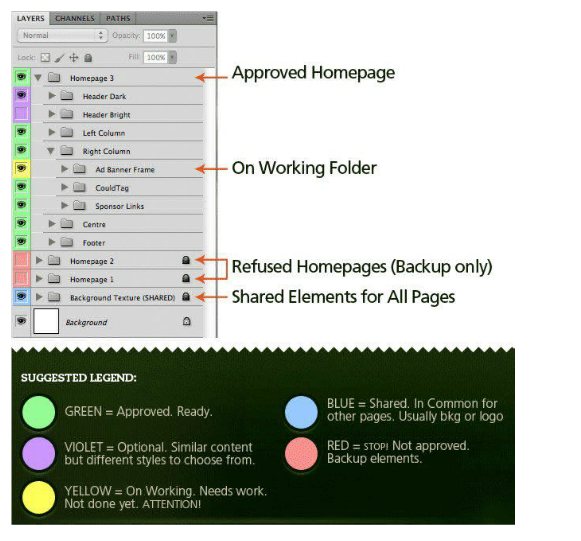
- Establish clear naming and color conventions in your PSD; if you have multiple states in a PSD (such as hover or active, etc.) indicate this through an easy-to-understand convention that a new collaborator can quickly recognize. Below is one of possible ways:
- make naming your layers a habit;
- group high-level elements (e.g. Header, Section, Footer, etc.) or group related elements (e.g. buttons, graphical treatments, etc.) to make navigating through your PSD a picnic;
- whether you order your layers bottom-to-top or top-to-bottom, it’s essential to keep in mind that there should be some kind of hierarchical ordering of groups and layers within your PSD file.
Use smart objects & layer comps
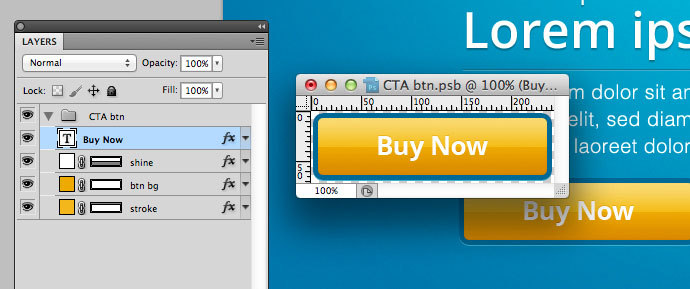
Smart Objects. Sometimes you need to preserve the original EPS of an object. Other times, you may want to gather multiple instances of an element into one easily editable .PSB file. [Layer > Smart Object > Convert to Smart Object] will compile multiple elements into a file that can be edited outside of your PSD.
There’s nothing worse than going to “make the logo bigger” and realizing you can’t because it’s rasterized graphics, or trying to resize a button only to find that it’s no longer the right shape. The solution is to keep these shapes in vector format, and you can do that by importing them as Vector Smart Objects or converting them to Smart Objects before you rasterize them.
Check out Layer Comps [Window > Layer Comps] to organize multiple states or versions of layouts. Consider using Layer Comps to help viewers figure out which layers and groups to show and to hide. You can play with Visibility, Position, and Appearance for each layer comp you create; one more bonus to layer comps is that you can easily save out jpg’s (or any other file type, including PSDs) of all your layer comps via File > Scripts > Layer Comps to Files.

Clipping masks
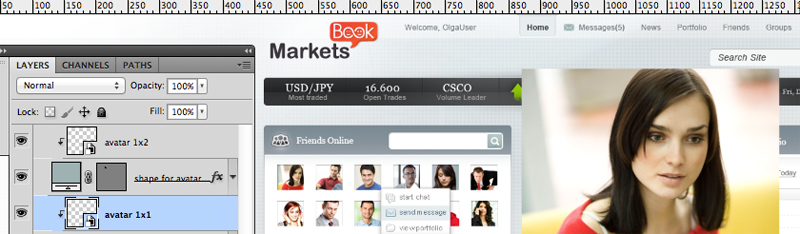
Often when creating images in Photoshop, you might want one layer to take on the shape of another one. For instance, in the example below the photo has taken on the shape of a small avatar (shapes could vary from a rounder rectangle to a circle). The ideal way of doing it is by using a Clipping Mask and not via multiple edits or transferring layer masks.
Use adjustment layers
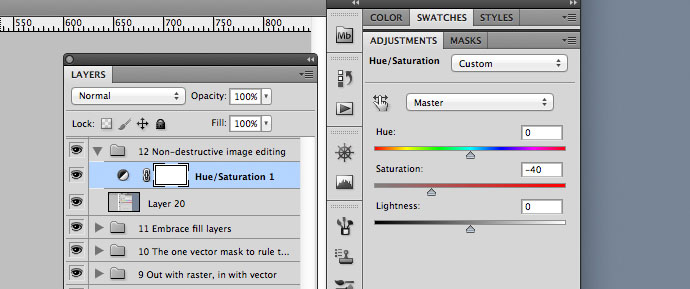
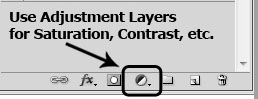
Adjustments like Hue/Saturation, Brightness/Contrast, and Levels are typically applied through the Image >> Adjustments menu. But that’s not the best practice. What will happen if you decide later to scale back that contrast change? You won’t be able to do it! Instead, apply adjustments as Adjustment Layers via the button found at the bottom of the Layers Box. Now your Adjustments are fully dynamic and flexible.
Well, we’ve shared our best, and how about you? What killer tips do you know? Give us a hint!